Moneycontrol Brokerage Recos

Showing posts with label Oracle 18c. Show all posts

Tuesday, October 15, 2019

YUM install of Oracle 18c XE database in Oracle Cloud Infrastructure


In this post, I would show you how you can deploy Oracle 18c XE database in Oracle Cloud Infrastructure Gen 2, in just one command.

Login to your OCI compute node where you want to deploy the Oracle 18c XE, please make a note that you have created the compute VM with Oracle Linx 7, Oracle Linux 8 still, at time of writing this post, doesn't have OCI included image for the 18c XE.


Since we are on OEL7.7 and OCI image already includes the Oracle 18c XE database rpm in there so doing pre-check is optional and we can directly install it using below one line command, it would automatically find the dependencies and do that job for you.


Let's initiate the installation now as below.


[root@oci02 ~]# yum install oracle-database-xe-18c.x86_64  
 Loaded plugins: langpacks, ulninfo  
 Resolving Dependencies  
 --> Running transaction check  
 ---> Package oracle-database-xe-18c.x86_64 0:1.0-1 will be installed  
 --> Processing Dependency: oracle-database-preinstall-18c for package: oracle-database-xe-18c-1.0-1.x86_64  
 --> Running transaction check  
 ---> Package oracle-database-preinstall-18c.x86_64 0:1.0-1.el7 will be installed  
 --> Finished Dependency Resolution  
 Dependencies Resolved  
 =============================================================================================================================================================================================  
  Package                           Arch                Version                 Repository                   Size  
 =============================================================================================================================================================================================  
 Installing:  
  oracle-database-xe-18c                   x86_64               1.0-1                  ol7_oci_included               2.4 G  
 Installing for dependencies:  
  oracle-database-preinstall-18c               x86_64               1.0-1.el7                ol7_latest                   18 k  
 Transaction Summary  
 =============================================================================================================================================================================================  
 Install 1 Package (+1 Dependent package)  
 Total download size: 2.4 G  
 Installed size: 5.2 G  
 Is this ok [y/d/N]: y  
 Downloading packages:  
 (1/2): oracle-database-preinstall-18c-1.0-1.el7.x86_64.rpm                                                      | 18 kB 00:00:00  
 (2/2): oracle-database-xe-18c-1.0-1.x86_64.rpm                                                            | 2.4 GB 00:01:11  
 ---------------------------------------------------------------------------------------------------------------------------------------------------------------------------------------------  
 Total                                                                             34 MB/s | 2.4 GB 00:01:11  
 Running transaction check  
 Running transaction test  
 Transaction test succeeded  
 Running transaction  
  Installing : oracle-database-preinstall-18c-1.0-1.el7.x86_64                                                              1/2  
  Installing : oracle-database-xe-18c-1.0-1.x86_64                                                                    2/2  
 [INFO] Executing post installation scripts...  
 [INFO] Oracle home installed successfully and ready to be configured.  
 To configure Oracle Database XE, optionally modify the parameters in '/etc/sysconfig/oracle-xe-18c.conf' and then execute '/etc/init.d/oracle-xe-18c configure' as root.  
  Verifying : oracle-database-xe-18c-1.0-1.x86_64                                                                    1/2  
  Verifying : oracle-database-preinstall-18c-1.0-1.el7.x86_64                                                              2/2  
 Installed:  
  oracle-database-xe-18c.x86_64 0:1.0-1  
 Dependency Installed:  
  oracle-database-preinstall-18c.x86_64 0:1.0-1.el7  
 Complete!  
 [root@oci02 ~]#  

Above you see, it installed the 18c XE HOME and it points you to the configuration file that you can modify per your needs and run the /etc/init.d/oracle-xe-18c configure to create the XE container database for you, as below.


Default, sample configuration file that would be used to created the database.


 [root@oci02 ~]# cat /etc/sysconfig/oracle-xe-18c.conf  
 #This is a configuration file to setup the Oracle Database.  
 #It is used when running '/etc/init.d/oracle-xe-18c configure'.  
 # LISTENER PORT used Database listener, Leave empty for automatic port assignment  
 LISTENER_PORT=  
 # EM_EXPRESS_PORT Oracle EM Express URL port  
 EM_EXPRESS_PORT=5500  
 # Character set of the database  
 CHARSET=AL32UTF8  
 # Database file directory  
 # If not specified, database files are stored under Oracle base/oradata  
 DBFILE_DEST=  
 # SKIP Validations, memory, space  
 SKIP_VALIDATIONS=false  
 [root@oci02 ~]# 


Let's create the database as below. You need to provide a complex password that will be used for SYS, SYSTEM and PDBADMIN accounts commonly, later you may change it which is different to each other once database instance created successfully.


 [root@oci02 ~]# /etc/init.d/oracle-xe-18c configure  
 Specify a password to be used for database accounts. Oracle recommends that the password entered should be at least 8 characters in length, contain at least 1 uppercase character, 1 lower case character and 1 digit [0-9]. Note that the same password will be used for SYS, SYSTEM and PDBADMIN accounts:  
 Confirm the password:  
 Configuring Oracle Listener.  
 Listener configuration succeeded.  
 Configuring Oracle Database XE.  
 Enter SYS user password:  
 ********  
 Enter SYSTEM user password:  
 *******  
 Enter PDBADMIN User Password:  
 **********  
 Prepare for db operation  
 7% complete  
 Copying database files  
 29% complete  
 Creating and starting Oracle instance  
 30% complete  
 31% complete  
 34% complete  
 38% complete  
 41% complete  
 43% complete  
 Completing Database Creation  
 47% complete  
 50% complete  
 Creating Pluggable Databases  
 54% complete  
 71% complete  
 Executing Post Configuration Actions  
 93% complete  
 Running Custom Scripts  
 100% complete  
 Database creation complete. For details check the logfiles at:  
  /opt/oracle/cfgtoollogs/dbca/XE.  
 Database Information:  
 Global Database Name:XE  
 System Identifier(SID):XE  
 Look at the log file "/opt/oracle/cfgtoollogs/dbca/XE/XE.log" for further details.  
 Connect to Oracle Database using one of the connect strings:  
    Pluggable database: oci02/XEPDB1  
    Multitenant container database: oci02  
 Use https://localhost:5500/em to access Oracle Enterprise Manager for Oracle Database XE  
 [root@oci02 ~]# 

Once database instance gets configured, you are provided "Database Information" and connect string for the Pluggable database, dbca log file location that you can review and finally Enterprise Manager URL to use for the database monitoring purpose.


Finally you may spare few mins and validate the container database information.

 [root@oci02 ~]# ps -ef | grep pmon  
 oracle  23387   1 0 19:00 ?    00:00:00 xe_pmon_XE  
 root   23902 11789 0 19:02 pts/0  00:00:00 grep --color=auto pmon  
 [root@oci02 ~]#  
 [root@oci02 ~]# su - oracle  
 Last login: Mon Oct 14 18:51:07 GMT 2019 on pts/0  
 [oracle@oci02 ~]$  
 [oracle@oci02 ~]$ . oraenv  
 ORACLE_SID = [oracle] ? XE  
 The Oracle base has been set to /opt/oracle  
 [oracle@oci02 ~]$  
 [oracle@oci02 ~]$ sqlplus "/as sysdba"  
 SQL*Plus: Release 18.0.0.0.0 - Production on Mon Oct 14 19:03:09 2019  
 Version 18.4.0.0.0  
 Copyright (c) 1982, 2018, Oracle. All rights reserved.  
 Connected to:  
 Oracle Database 18c Express Edition Release 18.0.0.0.0 - Production  
 Version 18.4.0.0.0  
 SQL>  


 SQL> select name, open_mode, database_role, cdb from v$database;  
 NAME   OPEN_MODE      DATABASE_ROLE  CDB  
 --------- -------------------- ---------------- ---  
 XE    READ WRITE      PRIMARY     YES  
 SQL> show pdbs  
   CON_ID CON_NAME            OPEN MODE RESTRICTED  
 ---------- ------------------------------ ---------- ----------  
      2 PDB$SEED            READ ONLY NO  
      3 XEPDB1             READ WRITE NO  
 SQL> 


Hope it helps, thanks for reading, please subscribe to this blog to stay tuned with latest news on Oracle Cloud Infrastructure and Oracle Autonomous Database Cloud Services and other new articles.

Twitter : https://twitter.com/rajsoft8899
Linkedin : https://www.linkedin.com/in/raj-kumar-kushwaha-5a289219/
Facebook : https://www.facebook.com/rkushawaha


Sunday, September 22, 2019

Cloning an Autonomous Transaction Processing Database


So far we have seen how to create an Autonomous Transaction Processing Database(click here) and seen how to login to its service console to monitor the database activities and do some administration work.

In this article, I would demonstrate the process to Clone an Autonomous Transaction Processing database as and when required. Purpose of the cloning is to get a full copy of the production database to do the development or testing works.


There are two options to clone an Autonomous Transaction Processing Database:

1 - Full Clone

2 - Metadata Clone


Let's now see how easily we can clone an ATP(Autonomous Transaction Processing) database using its Details page.


Login to the ATP instance you want to clone via its direct link or you can navigate through the Oracle Cloud Infrastructure Console.

Source DB Name = DB201909201730

Target Clone DB Name = CLONEDB


I have the direct link for my ATP database named DB201909201730 , so I login with that as below.


Having logged in to the ATP instance, Autonomous Database Details page opens, Click on the "Action" drop down menu and then Click "Create Clone" to clone this database.


"Create Autonomous Database Clone" page opens where you specify the target clone database name and its details.


Here I want a Full clone (default option) to clone my source DB(DB201909201730). Select the Compartment in which you want to place this resource and provide the target DB name and Database Display Name.


Since I am using the "Always Free" credentials so I just turn this option on that makes CPU core count and Storage limits gets populated automatically. Provide Admin password.


Further, "License Included" option is selected by default, if a customer already has appropriate licensing then he/she can select the BYOL option as needed. Provide the Tag Key and its Value and finally click on "Create Autonomous Database Clone" to start the cloning job.


Cloning job has been started now.


You can monitor the progress of the cloning job > click on the "Work Request" under the "Resources" in left side at Database Details page. Here you can see the job progress in terms of % Complete, job stared date timestamp.


To go further in monitoring the cloning job, click on the Work Request > Operation and you get to "Create Autonomous Database" page and see more logs.


In few mins, your ATP clone created.


Autonomous Database > has list of clone ATP now.


I am now able to login to the CLONEDB ATP instance as below.


Cloning Limitation for Autonomous Transaction Processing Database:

1 > Oracle Machine Learning workspaces, projects, and notebooks of the source database are not cloned to the new database.
2 > If there is an ongoing clone operation on a source database, you cannot initiate a new clone operation on the database being cloned until the ongoing operation completes.
3 > You can only clone an Autonomous Transaction Processing instance to the same tenancy and the same region as the source database.
4 > If you define a network Access Control List (ACL) on the source database, the network ACL is cloned to the new database.


Optimizer Statistics for a Cloned Database:

During the provisioning for either a Full Clone or a Metadata Clone, the optimizer statistics are copied from the source database to the cloned database.

The following applies for optimizer statistics for tables in a cloned database:

Full Clone : loads into tables behave the same as loading into a table with statistics already in place.


Metadata Clone : the first load into a table after the clone clears the statistics for that table and updates the statistics with the new load.


Resource Management Rules and Performance Data for a Cloned Database:

The following applies for resource management rules and performance data in a
cloned database:

>  During the provisioning for either a Full Clone or a Metadata Clone, any resource management rule changed by the user in the source database is carried over to the cloned database.

>  Performance data for the time before the clone operation is not visible on the service console of the cloned database.


Hope it helps, thanks for reading, please subscribe to this blog to stay updated with latest news on Oracle Autonomous Transaction Processing Cloud Services and new articles.


Twitter : https://twitter.com/rajsoft8899
Linkedin : https://www.linkedin.com/in/raj-kumar-kushwaha-5a289219/

Oracle Autonomous Database - Performance Monitoring


In previous article(Click Here to know about creating autonomous database cloud services in OCI), we seen how to create an Oracle Autonomous Transaction Processing Database service in Oracle Cloud Infrastructure Services. Since it is the autonomous database service so user or Database Administrators are not entitled to have access to the compute nodes where these autonomous database services are running. Oracle does things automatically itself.


Still you can monitor the autonomous database workloads using its monitoring service console and you can monitor the currently running SQL statements, CPU utilization, Storage usage etc. on its underline machine where your autonomous database cloud service is hosted.


Login to the autonomous database directly using its service console link or you can do that via navigating through your Oracle Cloud Infrastructure Console (to know about navigating through Oracle Cloud Infrastructure Console - Click here)


I have the direct link for its service console for my autonomous database cloud service so I login there as below.


Click on "Sign in" and you get the Autonomous Transaction Processing - Overview page.

On Overview page - you can see the Storage used by the current ATP instance, you get average CPU utilization over a period of time, average number of SQL statements running over a period of time. No. of OCPU allocated for this autonomous database instance, average response time for the SQL statements etc. This page gives an idea about overall workload and average response time of the SQL statements for this database service.


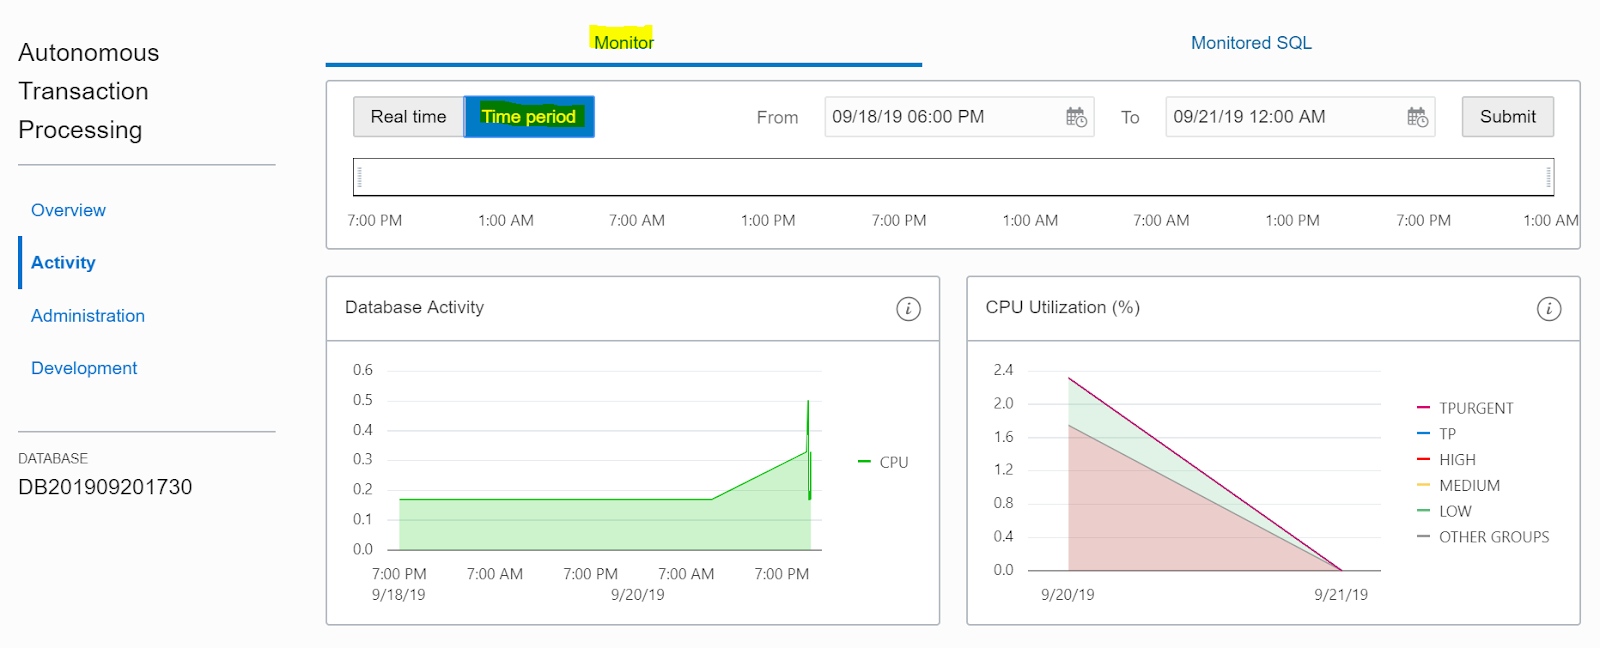
Click on on "Activity" option under "Autonomous Transaction Processing" and you get SQL Monitoring details - there are two separate tabs on this page one is "Monitor" and the other is "Monitored SQL".

Under "Monitor" tab (is default tab for Activity option), you get "Real time" database workload i.e. "Database Activity", "CPU Utilization", "Running Statements", "Queued Statements", it is very similar to the Oracle Enterprise Manager's Performance Hub where we get similar way to look over the real time database activities.


Second tab - "Time period" under the "Monitor" is to look for the historical monitoring data that gets captured in previous "Real time" tab. You can select "From" and "To" time-periods and Submit the search criteria to get Database activity, CPU utilization etc details historically.


On the Activity page, click on the second tab - "Monitored SQL" this tab shows current and past SQL statements and you get the more commands on the SQL statements running in the database.

To see the detailed SQL Monitor report for a statement, select a statement and click Show Details. The Overview tab in the pop-up shows general information for that statement. Click Plan Statistics tab to see the run-time execution plan of the statement. Click Parallel tab to see information about the parallel processes, if the statement uses parallelism.


If you want to download an active SQL Monitor report for a statement, select the statement in the Monitored SQL page and click Download report. This will save the active SQL Monitor report to your client


To cancel a running statement, select that statement in the Monitored SQL list and click Cancel execution. Tt is very much like "ALTER SYSTEM CANCEL SQL" command introduced in Oracle Database 12c Release 2 (to know more about cancelling a particular SQL statement running in a database session - Click Here).


You can add more monitoring attributes on this page by clicking on the "Setting" drop down menu at right side of the "Auto Refresh" option. You can "Check"/"Un-check" the fields you want to be displayed from the setting drop-down list


Now, click on the "Administration" option in left panel to perform some administration work. You can download the client credentials (Wallet) from here that includes the TNS details of the autonomous transaction processing instance that you can use to connect from your local client machine - i.e. SQL*Plus client, SQL Developer.

You can define Resource Management rules for the CPU and I/O for consumer groups to cancel SQL statements automatically when it crosses the defined CPU/IO thresholds.

Using the "Set Administrator Password", you can create or reset the password for the autonomous database administrator's password, default administrator is ADMIN user. You can also unlock the ADMIN administrator account if it is locked.


You can create/modify Oracle Machine Learning Users using the "Manage Oracle ML Users" option.


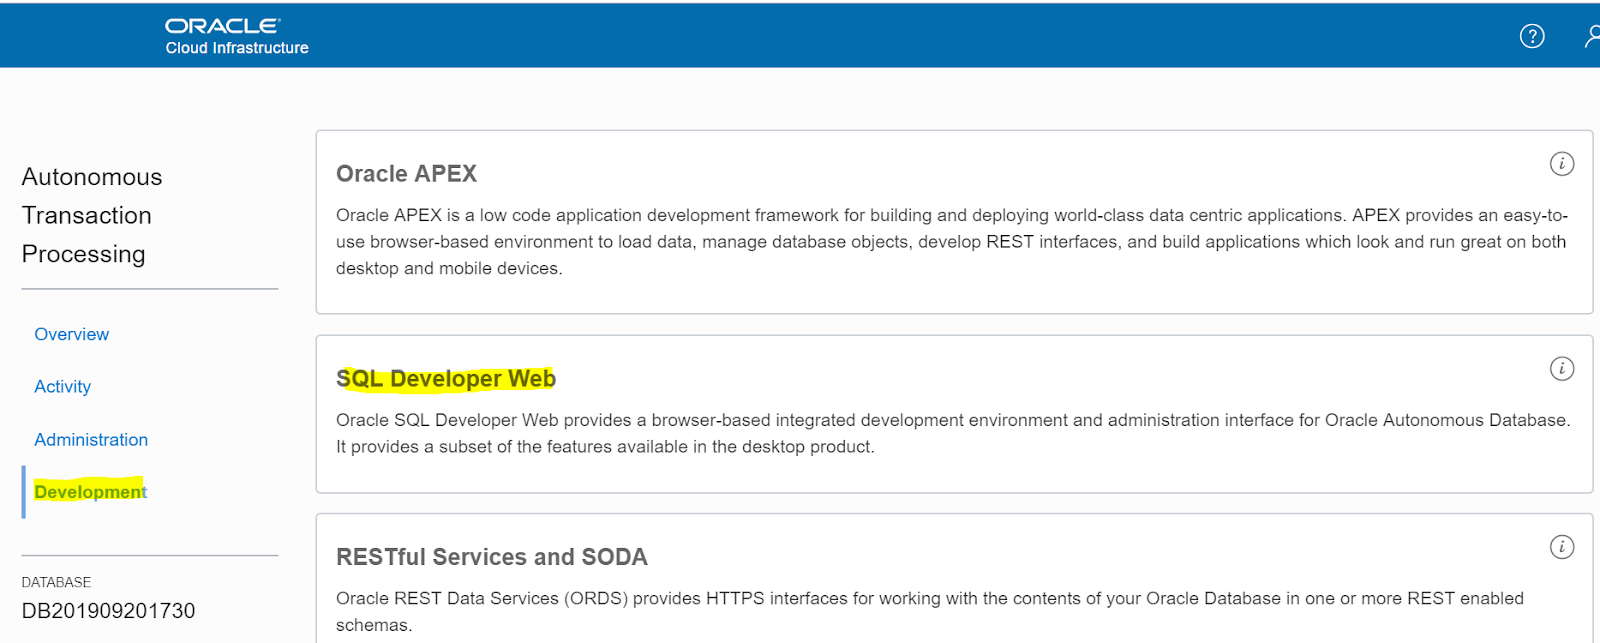
Click on the "Development" in left panel to deal with development related tool and applications. From here, you can jump to "Oracle APEX", "SQL Developer Web" (Click Here to know how to use this "SQL Developer Web" application to connect to your Autonomous Database Transaction Processing Instance)


You can use Oracle's newly introduced Machine Learning Notebook, download Oracle Instant Client etc.


Hope it helps, thanks for reading, please subscribe to this blog to stay updated with latest news on Oracle Autonomous Database Cloud Services and new articles.

Twitter : https://twitter.com/rajsoft8899
Linkedin : https://www.linkedin.com/in/raj-kumar-kushwaha-5a289219/

Saturday, September 21, 2019

Connecting SQL Developer Web to Autonomous Database Cloud


In the previous article(Click here), we seen how to provision Autonomous Database Cloud Service in Oracle Cloud Infrastructure Services.

Let's now see how we can access that Autonomous Transaction Processing Database Cloud Service using the SQL Developer Web console and start playing with that with minimal command line skills. You can do most out of this web tool graphically.


Login to your Oracle Cloud tenant and go to the "Autonomous Transaction Processing" > click on it.


Autonomous Databases page opens where you would get the list of all ATP instances you have provisioned, now click on the Name of the Autonomous Database you want. In my case, only one ATP instance is there so I click on it.


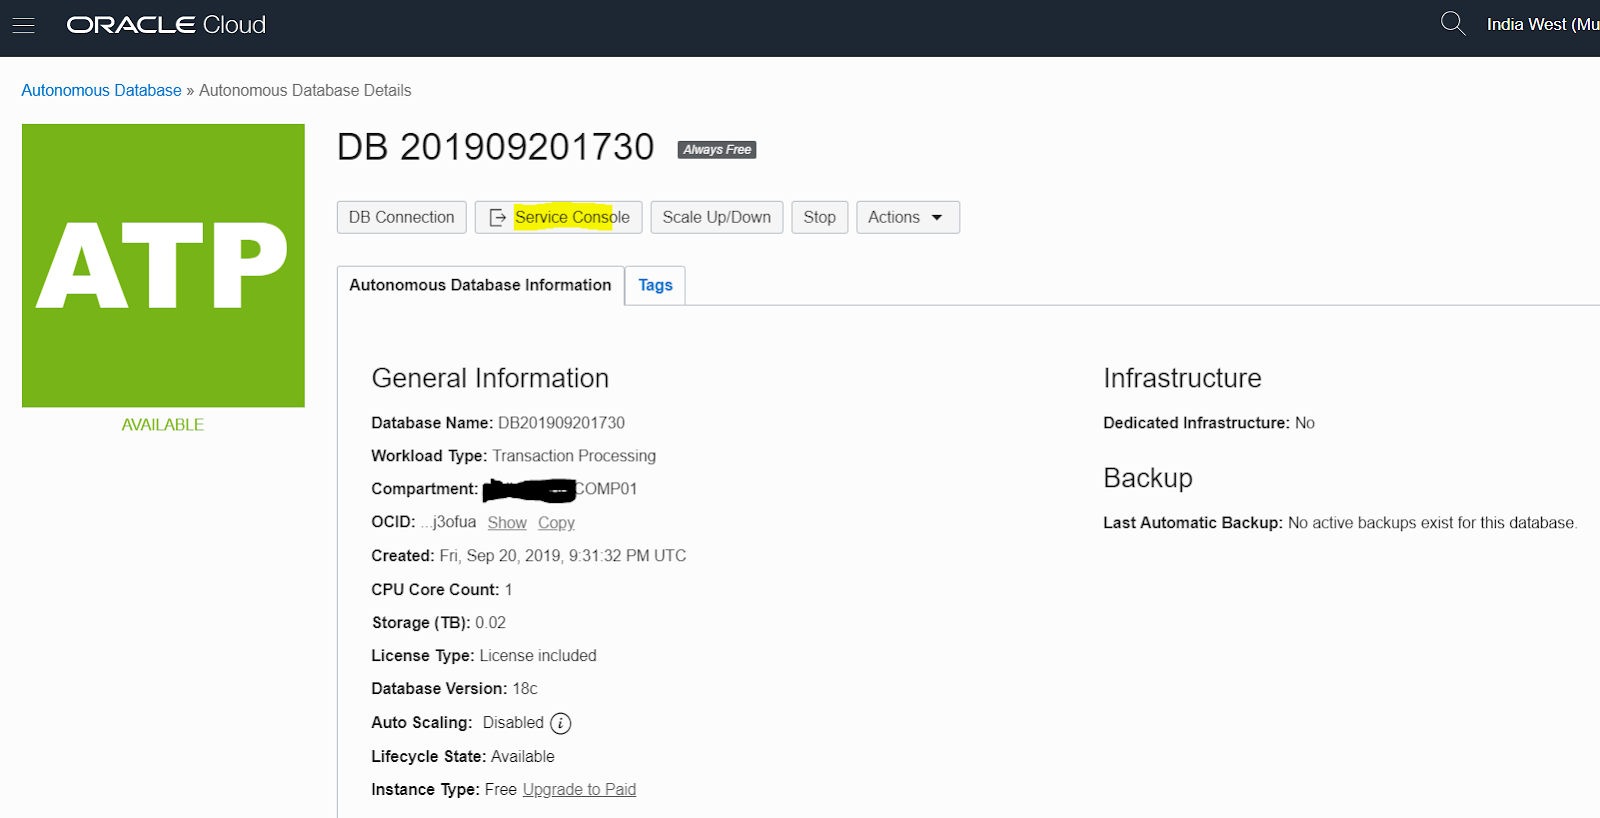
Now Autonomous Database Details page opens, here you see detailed information of the ATP instance, Now click on the "Service Console" to go to the "Overview" monitoring page for this database.


Here on this page, click on the "Development" menu at left side and the click on "SQL Developer Web".


Oracle SQL Developer Web page opens now, here you provide the default ADMIN user and its password that you have provided while provisioning the Autonomous Database and click on "Sign in".


Once you connect, SQL Developer Worksheet opens, now here you can play with your development stunts and even do "Data Modeling" using the "Data Modeler" tab.


To view the execution plan for a particular SQL statement, just select the SQL statement of interest in the worksheet and then click on the Execution Plan icon on the worksheet menu just at the top.


Graphically, even you can create index for a table here.


Once you apply the index property for the table, you get the output result with its DDLs.


Once you select "All objects" in the navigation panel, you get all objects list, in our case newly created index is visible now.


Index getting used for our select statement now.


Hope it helps, subscribe to this blog to stay updated on latest Oracle Autonomous Database features and new articles.

Twitter : https://twitter.com/rajsoft8899
Linkedin : https://www.linkedin.com/in/raj-kumar-kushwaha-5a289219


Sunday, September 8, 2019

DROP Pluggable Database


Theory from Oracle Doc:


Drop a PDB when you want to move the PDB to a new CDB or when you no longer need it. When you drop a PDB, the control file of the CDB is modified to eliminate all references to the dropped PDB. Archived redo log files and backups associated with the PDB are not removed, but you can use Oracle Recovery Manager (RMAN) to remove them.

When dropping a PDB, you can either keep or delete the PDB's data files by using one of the following clauses of the DROP PLUGGABLE DATABASE statement:

KEEP DATAFILES, the default, retains the data files. The PDB temp file is removed even when KEEP DATAFILES is specified because the temp file is no longer needed. When KEEP DATAFILES is specified, the PDB must be unplugged.

INCLUDING DATAFILES removes the data files from disk. If a PDB was created with the SNAPSHOT COPY clause, then you must specify INCLUDING DATAFILES when you drop the PDB.


Prerequisites

The following prerequisites must be met:

• The PDB must be in mounted mode, or it must be unplugged.
• The current user must have SYSDBA or SYSOPER administrative privilege, and the privilege must be either commonly granted or locally granted in the PDB. The user must exercise the privilege using AS SYSDBA or AS SYSOPER at connect time.


To drop a PDB:

1 - In SQL*Plus, ensure that the current container is the CDB root, or, for an application PDB, the application root that contains the application PDB. If the PDB is plugged into the CDB root, then the current container must be the CDB root. If the PDB is plugged into an application root, then the current container must be that application root or the CDB root. If you are dropping an application container, then the current container must be the CDB root, and the application container must not have any application PDBs plugged into it.

2 - Run the DROP PLUGGABLE DATABASE statement and specify the PDB to drop.

Example : Dropping PDB salespdb While Keeping Its Data Files

SQL> DROP PLUGGABLE DATABASE pdb_name KEEP DATAFILES;

Example : Dropping PDB salespdb and Its Data Files

SQL> DROP PLUGGABLE DATABASE pdb_name INCLUDING DATAFILES;


Demonstration

We many DEV Pluggable databases that we created in the previous article - Click here to read how to create many PDBs in bulk using OEM.

SQL> show pdbs

    CON_ID CON_NAME                       OPEN MODE  RESTRICTED
---------- ------------------------------ ---------- ----------
         2 PDB$SEED                       READ ONLY  NO
         3 PDB1                           READ WRITE NO
         4 PDB2                           READ WRITE NO
         5 PDB_DEV2                       READ WRITE NO
         6 PDB_DEV3                       READ WRITE NO
         7 PDB_DEV4                       READ WRITE NO
         8 PDB_DEV5                       READ WRITE NO
        10 PDB_DEV1                       READ WRITE NO


Closing/shutting down all PDBs that needs to be dropped:

SQL> alter pluggable database PDB_DEV1 close;

Pluggable database altered.

SQL> alter pluggable database PDB_DEV2 close;

Pluggable database altered.

SQL> alter pluggable database PDB_DEV3 close;

Pluggable database altered.

SQL> alter pluggable database PDB_DEV4 close;

Pluggable database altered.

SQL> alter pluggable database PDB_DEV5 close;

Pluggable database altered.


Validate if all are in MOUNTED state now.

SQL> show pdbs

    CON_ID CON_NAME                       OPEN MODE  RESTRICTED
---------- ------------------------------ ---------- ----------
         2 PDB$SEED                       READ ONLY  NO
         3 PDB1                           READ WRITE NO
         4 PDB2                           READ WRITE NO
         5 PDB_DEV2                       MOUNTED
         6 PDB_DEV3                       MOUNTED
         7 PDB_DEV4                       MOUNTED
         8 PDB_DEV5                       MOUNTED
        10 PDB_DEV1                       MOUNTED


Drop the PDBs with clause "including datafiles"

SQL> drop pluggable database PDB_DEV1 including datafiles;

Pluggable database dropped.

SQL> drop pluggable database PDB_DEV2 including datafiles;

Pluggable database dropped.

SQL> drop pluggable database PDB_DEV3 including datafiles;

Pluggable database dropped.

SQL> drop pluggable database PDB_DEV4 including datafiles;

Pluggable database dropped.

SQL> drop pluggable database PDB_DEV5 including datafiles;

Pluggable database dropped.


Validate if PDBs are dropped and gone successfully.

SQL> show pdbs

    CON_ID CON_NAME                       OPEN MODE  RESTRICTED
---------- ------------------------------ ---------- ----------
         2 PDB$SEED                       READ ONLY  NO
         3 PDB1                           READ WRITE NO
         4 PDB2                           READ WRITE NO
SQL>


Hope it helps, subscribe to this blog to stay updated on latest Oracle Technologies and new articles.

Twitter : @rajsoft8899
Linkedin : https://www.linkedin.com/in/raj-kumar-kushwaha-5a289219/

Thursday, September 5, 2019

PDB Cloning in same CDB


In this article, I would explain how to clone an existing Pluggable Database into a new PDB or you can say - create a new PDB from an existing PDB in the same container database.


In this demo, we would be cloning PDB3 as a new Pluggable Database named PDB4.

1 - Let's see the existing list of PDBs currently we have using "show pdbs" command.


SQL> show pdbs

    CON_ID CON_NAME                       OPEN MODE  RESTRICTED
---------- ------------------------------ ---------- ----------
         2 PDB$SEED                       READ ONLY  NO
         3 PDB1                           READ WRITE NO
         4 PDB2                           READ WRITE NO
         5 PDB3                           READ WRITE NO
SQL>


2 - Review the GUID for the individual PDBs

SQL> select con_id, guid, name, open_mode from v$pdbs;

    CON_ID GUID                             NAME                           OPEN_MODE
---------- -------------------------------- ------------------------------ ----------
         2 8FA8EFE7EE287653E0537C17800A501C PDB$SEED                       READ ONLY
         3 90C13D2FC47D70F9E0537C17800ACC04 PDB1                           READ WRITE
         4 91AC92BB3457B533E0537C17800AF412 PDB2                           READ WRITE
         5 91C3038EF67B5702E0537C17800A84C6 PDB3                           READ WRITE


3 - Here I am going to create a new tablespace into the PDB3 so that when we clone this as PDB4 so difference be visible.

SQL> alter session set container = pdb3;

Session altered.

SQL> show con_name

CON_NAME
------------------------------
PDB3
SQL>


SQL> select name from v$datafile;

NAME
--------------------------------------------------------------------------------
+DATAC1/CDB1/DATAFILE/undotbs1.11084.1015822335
+DATAC1/CDB1/91C3038EF67B5702E0537C17800A84C6/DATAFILE/system.9073.1018133353
+DATAC1/CDB1/91C3038EF67B5702E0537C17800A84C6/DATAFILE/sysaux.3022.1018133353
+DATAC1/CDB1/91C3038EF67B5702E0537C17800A84C6/DATAFILE/users.3693.1018133353

SQL>


SQL> create tablespace tbs1 datafile '+DATAC1' size 100m;

Tablespace created.


SQL> select name from v$datafile;


NAME
--------------------------------------------------------------------------------
+DATAC1/CDB1/DATAFILE/undotbs1.11084.1015822335
+DATAC1/CDB1/91C3038EF67B5702E0537C17800A84C6/DATAFILE/system.9073.1018133353
+DATAC1/CDB1/91C3038EF67B5702E0537C17800A84C6/DATAFILE/sysaux.3022.1018133353
+DATAC1/CDB1/91C3038EF67B5702E0537C17800A84C6/DATAFILE/users.3693.1018133353
+DATAC1/CDB1/91C3038EF67B5702E0537C17800A84C6/DATAFILE/tbs1.3023.1018133807

SQL>


4 - Here now we create PDB4 from the existing PDB3 using the below simple command. This is how simple it is to clone a PDB into Oracle Multi-tenant Architecture.

SQL> create pluggable database pdb4 from pdb3;

Pluggable database created.


5 - You can list all the PDBs in the CDB using the "show pdbs" command and you can see that new PDB4 is created now. By default, new PDB be in MOUNT state when gets created.

SQL> show pdbs

    CON_ID CON_NAME                       OPEN MODE  RESTRICTED
---------- ------------------------------ ---------- ----------
         2 PDB$SEED                       READ ONLY  NO
         3 PDB1                           READ WRITE NO
         4 PDB2                           READ WRITE NO
         5 PDB3                           READ WRITE NO
         6 PDB4                           MOUNTED


6 - Open the Pluggable Database using below command.

SQL> alter pluggable database pdb4 open;

Pluggable database altered.


7 - Validate the PDB open status now.

SQL> show pdbs

    CON_ID CON_NAME                       OPEN MODE  RESTRICTED
---------- ------------------------------ ---------- ----------
         2 PDB$SEED                       READ ONLY  NO
         3 PDB1                           READ WRITE NO
         4 PDB2                           READ WRITE NO
         5 PDB3                           READ WRITE NO
         6 PDB4                           READ WRITE NO


8 - Validate new PDB details.

SQL> alter session set container = pdb4;

Session altered.

SQL> show con_name

CON_NAME
------------------------------
PDB4
SQL>


Each PDB has its own GUID named directory under the parent Container Database directory where individual PDBs store its local tablespace/datafiles in there.

SQL> select con_id, guid, name, open_mode from v$pdbs;

    CON_ID GUID                             NAME                           OPEN_MODE
---------- -------------------------------- ------------------------------ ----------
         2 8FA8EFE7EE287653E0537C17800A501C PDB$SEED                       READ ONLY
         3 90C13D2FC47D70F9E0537C17800ACC04 PDB1                           READ WRITE
         4 91AC92BB3457B533E0537C17800AF412 PDB2                           READ WRITE
         5 91C3038EF67B5702E0537C17800A84C6 PDB3                           READ WRITE
         6 91C324409E5776D8E0537C17800A746B PDB4                           READ WRITE


Cloned PDB4 has all tablespaces as it was in PDB3 under its own GUID directory path.

SQL> select name from v$datafile;

NAME
----------------------------------------------------------------------------------------------------------------------------------------------------------------------------------------------------------------------------
+DATAC1/CDB1/DATAFILE/undotbs1.11084.1015822335
+DATAC1/CDB1/91C324409E5776D8E0537C17800A746B/DATAFILE/system.3134.1018133901
+DATAC1/CDB1/91C324409E5776D8E0537C17800A746B/DATAFILE/sysaux.663.1018133901
+DATAC1/CDB1/91C324409E5776D8E0537C17800A746B/DATAFILE/users.7266.1018133901
+DATAC1/CDB1/91C324409E5776D8E0537C17800A746B/DATAFILE/tbs1.7233.1018133901


Hope it helps, subscribe to this blog to stay updated on latest Oracle Technologies and new articles.

Twitter : @rajsoft8899
Linkedin : https://www.linkedin.com/in/raj-kumar-kushwaha-5a289219/


Thursday, July 26, 2018

Oracle Database 18c - Database Creation using DBCA


In our last article,[click here] we seen Oracle database 18c deployment - Software only. Here in this blog post, we would create a fresh database using Oracle database 18.3 DBCA.


$export ORACLE_HOME
$cd $ORACLE_HOME/bin

$export DISPLAY=:0.0


$./dbca

Select "Create a database" option and click next.


Fill the values for "Typical Configuration" options of database being created - i.e. your container (CDB) database name, and other options along with your container database SYS/SYSTEM user password. Choose option "Create as Container database" if you want your database to be Multi-tenant database and provide the PDB(Pluggable database) name under that. Click Next.


Since I have give a simple password so it pops up a warning that the password provided doesn't meet the Oracle recommended standards - to provide complex password, well I am OK with this and click on Yes to proceed with next step.


Here on this summary page, you can review all options you have selected - new thing here you would see that this summary page also lists the "Initialization Parameters" for the typical configuration option. Once you are OK with the options, click on Finish.


Database creation starts.......


Click on Close.....


Set the database OS environment.....and login to verify the instance.


By default, non-default pluggable databases open in MOUNTED state, you can then open them later using ALTER PLUGGABLE database command as below.


Subscribe to this blog to stay tuned for upcoming Oracle Database 18c articles.........


Wednesday, July 25, 2018

mount: unknown filesystem type 'vmhgfs'


It was a trouble sharing a host folder in the guest linux operating system after upgrading the VMware workstation to 12.0 from version 10 on windows 10


 root@rac1 mnt]# mount -t vmhgfs .host:/ /home/oracle  
 mount: unknown filesystem type 'vmhgfs' 


Solution: (run the guest operating system inside the VM)


 [root@rac1 mnt]# /usr/bin/vmhgfs-fuse /mnt  
 [root@rac1 mnt]# df -h  
 Filesystem      Size Used Avail Use% Mounted on  
 devtmpfs       4.9G   0 4.9G  0% /dev  
 tmpfs        4.9G 100K 4.9G  1% /dev/shm  
 tmpfs        4.9G 9.1M 4.9G  1% /run  
 tmpfs        4.9G   0 4.9G  0% /sys/fs/cgroup  
 /dev/mapper/ol-root  12G 4.2G 7.5G 36% /  
 /dev/mapper/ol-tmp  4.9G  45M 4.9G  1% /tmp  
 /dev/mapper/ol-u01  30G  19G  12G 63% /u01  
 /dev/sda1      197M 173M  25M 88% /boot  
 tmpfs        1000M 8.0K 1000M  1% /run/user/1001  
 /dev/sr0       102M 102M   0 100% /run/media/oracle/VMware Tools  
 vmhgfs-fuse     460G 400G  61G 87% /mnt 


Above you see that /mnt is mounted now, it was required since our shared folders get mounted inside this.


Now my shared folders are visible in the VMware operating system.


 [root@rac1 ~]# cd /mnt/  
 [root@rac1 mnt]# ls -ltr  
 total 12  
 drwxrwxrwx. 1 root root 4096 Jul 25 00:18 18c installation  
 drwxrwxrwx. 1 root root 8192 Jul 25 10:08 Database Products  
 [root@rac1 mnt]#  


Hope it would help !!

Oracle Database 18c - [18.3] Installation


Since Oracle Database 18c became available yesterday to download for on-premise deployment on Linux platforms now so here in this blog post, I would outline step by step installation of latest Oracle database 18.3 version.


Click here to download Oracle Database 18c - RU 18.3

Once downloaded, create Oracle Home directory on your target database server and unzip the downloaded oracle database 18c dbhome zip file in the ORACLE_HOME directory that you just created on your target database server.

In my test case, I unzipped my downloaded package inside following directory hence that is my ORACLE_HOME for this installation demo.

 [oracle@rac1 oracle]$ pwd  
 /u01/app/oracle 


Note : To install Oracle Database 18c RDBMS software and Oracle Database 18c Grid Infrastructure, you would have to invoke ./runInstaller and gridSetup.sh from unzipped ORACLE_HOME respectively.


Let's now invoke ./runInstaller from ORACLE_HOME - unzipped location to proceed with Oracle Database 18c installation.

 [oracle@rac1 oracle]$ export ORACLE_HOME=/u01/app/oracle  
 [oracle@rac1 oracle]$ ./runInstaller  


Once you invoke the ./runInstaller from ORACLE_HOME, then following "Configuration Option" installation wizard page appears.


This demo article is just for "Software Only" configuration, later we would take a look at creating database separately using DBCA. Click Next.


Select "Single instance database installation" and click Next.


Select the database edition you want to deploy, here in this demo paper, I selected "Enterprise Edition" and click Next.


Select "Oracle base" location per your environment and click Next.


Select OS authentication Membership OS groups for corresponding SYS privileges and click Next.


In above screenshot, some of the checks are warned so I just would just ignore all of them to proceed with Database deployment.


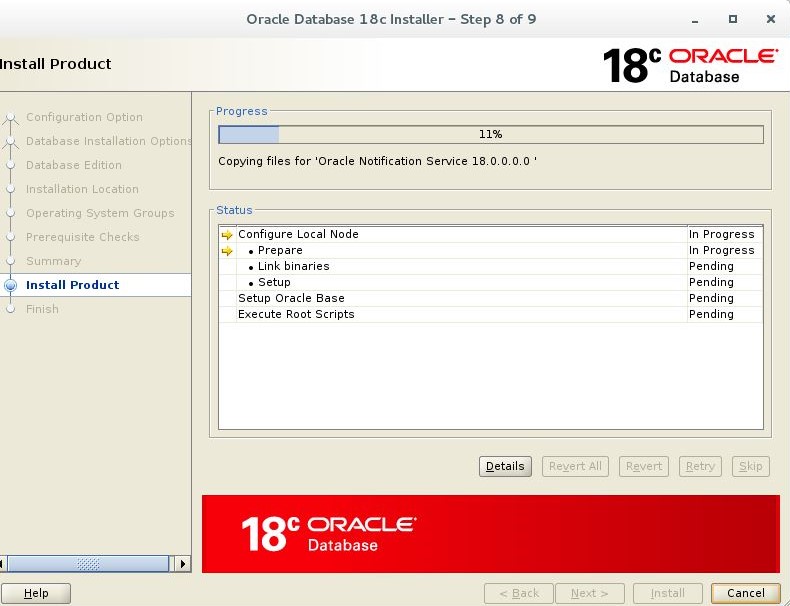
Above is the Database deployment summary settings page, in case if you want to take a look at all settings you did opt and click on "Install" to proceed with the deployment.


Here it prompts to run a root script, login to a separate terminal and run the script as root user.


Once interesting thing you notice above in root script execution is that, it installs TFA as well. Earlier we used to get this installed as part of Oracle Grid Infrastructure deployments.

After root script execution, click on OK and you are done with the Oracle Database 18c deployment now.


Click close -


Since, we have installed Oracle database 18c, so we can get its prompt now.


Here one interesting thing you would notice that TFA and OSWatcher get installed as part of Oracle database 18.3 deployment. So, you won't have to go and install these OS monitoring and database diagnostics log collection support tools separately.


Hope you enjoyed the step by step graphical deployment of Oracle database 18.3

Please subscribe to the blog to stay tuned on upcoming Oracle 18c articles.....