Since Oracle Database 18c became available yesterday to download for on-premise deployment on Linux platforms now so here in this blog post, I would outline step by step installation of latest Oracle database 18.3 version.
Click here to download Oracle Database 18c - RU 18.3
Once downloaded, create Oracle Home directory on your target database server and unzip the downloaded oracle database 18c dbhome zip file in the ORACLE_HOME directory that you just created on your target database server.
In my test case, I unzipped my downloaded package inside following directory hence that is my ORACLE_HOME for this installation demo.
 [oracle@rac1 oracle]$ pwd
 /u01/app/oracle
Note : To install Oracle Database 18c RDBMS software and Oracle Database 18c Grid Infrastructure, you would have to invoke ./runInstaller and gridSetup.sh from unzipped ORACLE_HOME respectively.
Let's now invoke ./runInstaller from ORACLE_HOME - unzipped location to proceed with Oracle Database 18c installation.
 [oracle@rac1 oracle]$ export ORACLE_HOME=/u01/app/oracle
 [oracle@rac1 oracle]$ ./runInstaller
Once you invoke the ./runInstaller from ORACLE_HOME, then following "Configuration Option" installation wizard page appears.

This demo article is just for "Software Only" configuration, later we would take a look at creating database separately using DBCA. Click Next.

Select "Single instance database installation" and click Next.

Select the database edition you want to deploy, here in this demo paper, I selected "Enterprise Edition" and click Next.

Select "Oracle base" location per your environment and click Next.

Select OS authentication Membership OS groups for corresponding SYS privileges and click Next.


In above screenshot, some of the checks are warned so I just would just ignore all of them to proceed with Database deployment.

Above is the Database deployment summary settings page, in case if you want to take a look at all settings you did opt and click on "Install" to proceed with the deployment.
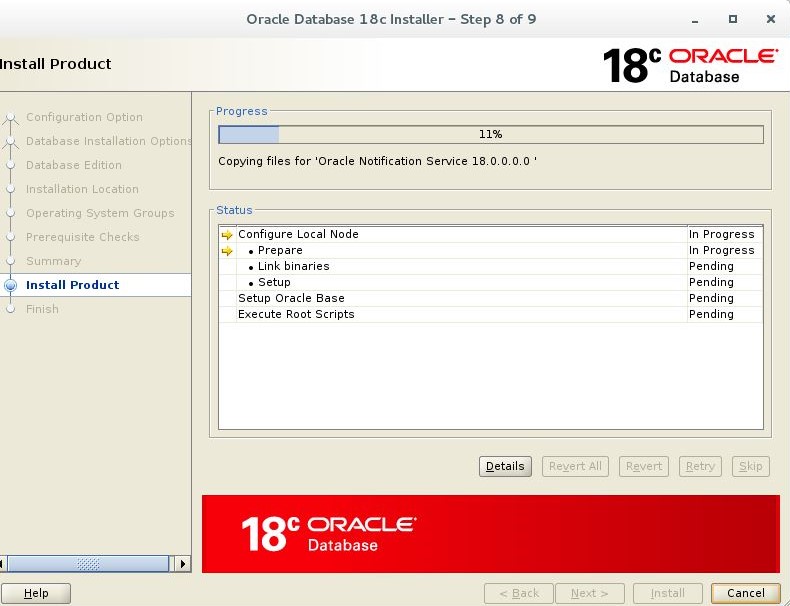

Here it prompts to run a root script, login to a separate terminal and run the script as root user.

Once interesting thing you notice above in root script execution is that, it installs TFA as well. Earlier we used to get this installed as part of Oracle Grid Infrastructure deployments.
After root script execution, click on OK and you are done with the Oracle Database 18c deployment now.

Click close -
Since, we have installed Oracle database 18c, so we can get its prompt now.

Here one interesting thing you would notice that TFA and OSWatcher get installed as part of Oracle database 18.3 deployment. So, you won't have to go and install these OS monitoring and database diagnostics log collection support tools separately.

Hope you enjoyed the step by step graphical deployment of Oracle database 18.3
Please subscribe to the blog to stay tuned on upcoming Oracle 18c articles.....
No comments:
Post a Comment